Doorstuff recently supplied a Perlan 140 timber sliding door system to Oli and Anna Greene in Cambridge. They very kindly emailed us pictures of their project and a brief explanation of what they had done to renovate their dining room. We have prepared a case study to assist others planning similar projects, fitting sliding doors, and re-purposing and recycling hinged timber doors.
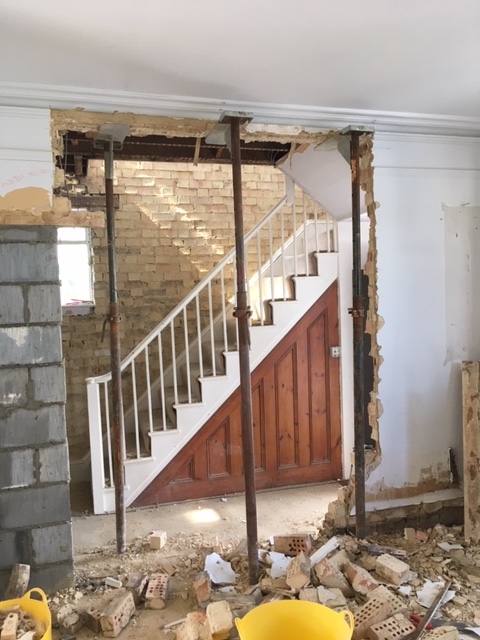
The first step in this renovation was the demolition of a section of wall where the new double doors were going to be. This is not always necessary especially for single sliding doors, but in this case the opening needed to be larger. In Fig. Step 1 you can see acrow props (steel posts) have been used to support part of the ceiling as the wall was load-bearing and so needed additional support after the removal of the wall. If you have a non-load bearing studwork wall in place the project to create a new opening will be easier all round.
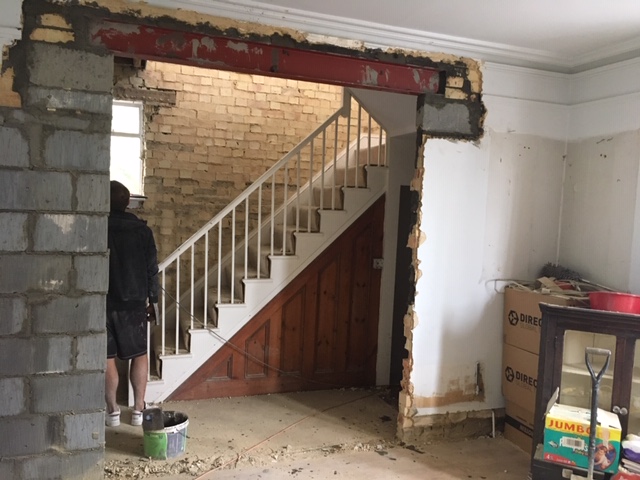
Next in Fig. Step 2 a steel joist was installed above the opening in the wall to take the load from above. Again, this would not always be necessary, as not all walls are load-bearing. Seek the advice of a professional before proceeding to remove masonry.
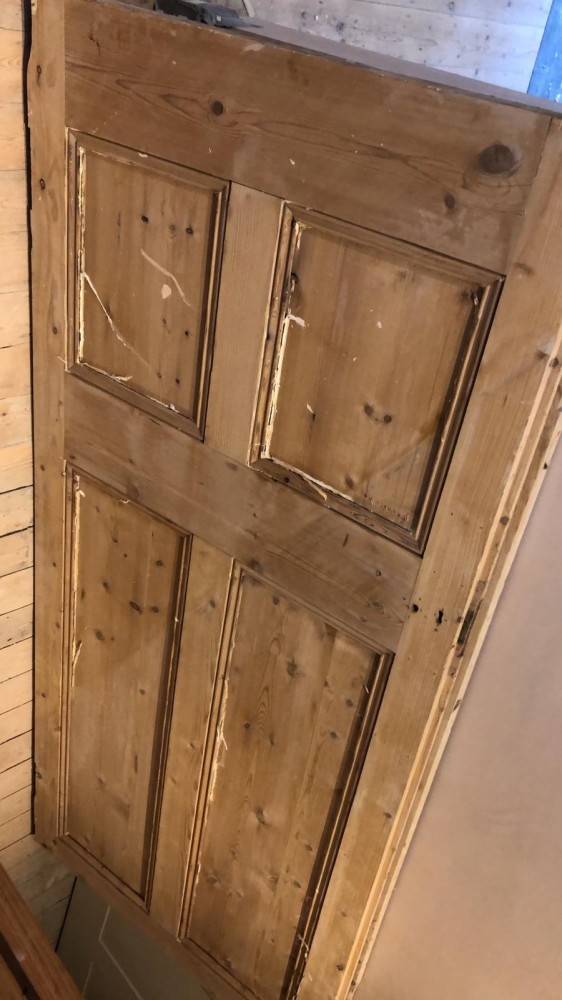
In Fig. Step 3, you can see the old hinged doors that were re-purposed to form the sliding doors. To do this the hinges were removed as well as other fittings such as the lock cases. (You can see in this picture that there had been an old-fashioned horizontal mortice sashlock fitted before the door was stripped down, filled, sanded and finished as required)
Attaching the sliding doors
In Fig. Step 4 you can see the doors attached to the Perlan 140 track. A batten – a piece of timber placed above and behind the track, has been fixed to the wall. The side mounting brackets, which are included in our Perlan 140 sliding door kits (but not when buying the track and components separately), have been used to attach the tracks to the batten – having first installed the running gear in the tracks.
Brackets were then attached to the top of the doors and the brackets were hooked over the suspension bolts protruding from the runners. The batten size and thickness needs to be taken into consideration in relation to the architrave and skirting board to keep everything fitting well. If you had a large gap between the door and wall, this could be filled by installing a brush seal strip however this is more functional than aesthetically pleasing and may not be appropriate for a sleek style.
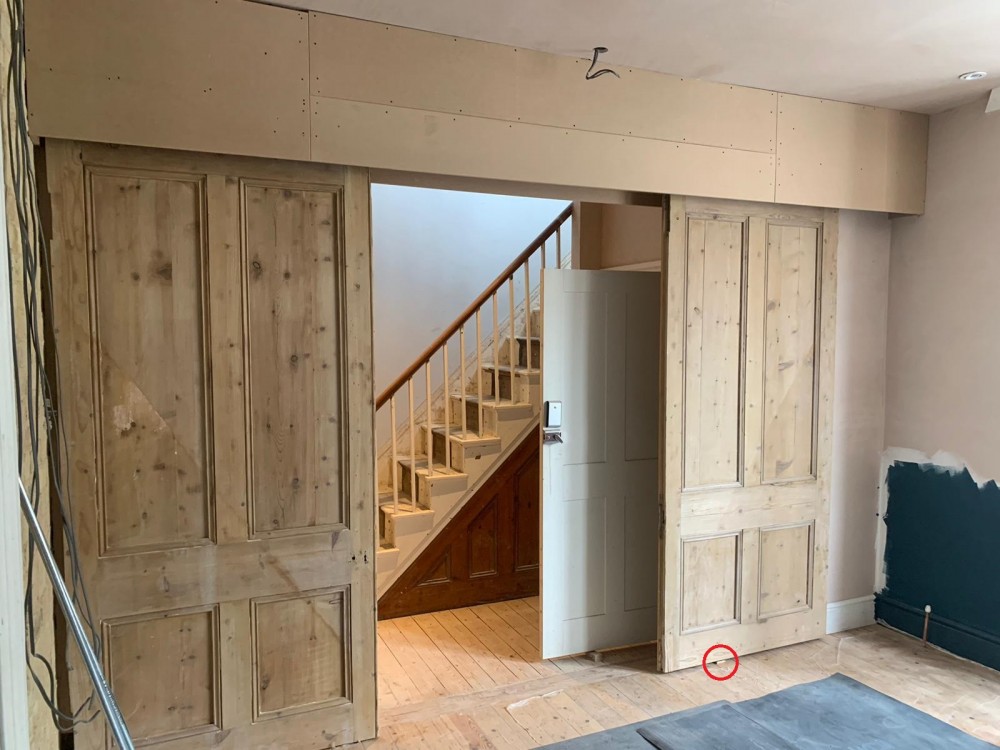
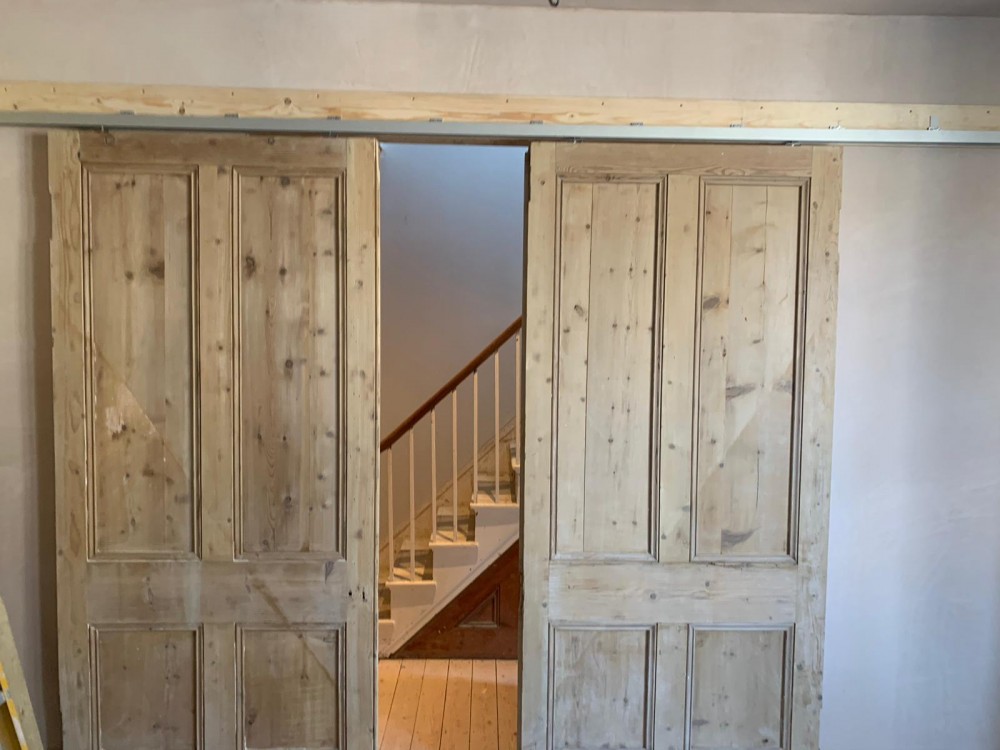
In Fig. Step 5 you can see the almost completed door; an MDF pelmet has been installed over the top to conceal the track and hangers. The fixed floor guide is just visible underneath the open door (see red circle) – this means that there is no track across the threshold and keeps the path through the door clear of obstruction. This type of floor guide is common in our range of sliding door gear and works well with underfloor heating and decorative flooring. A large range of optional full length floor guides and alternative floor guide solutions is available if this is required.
Finishing off the sliding doors
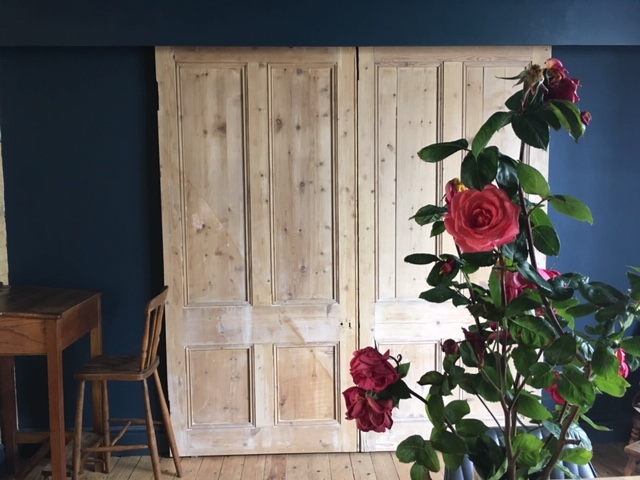
The final picture (below) shows the finished project with the walls and pelmet painted a gorgeous dark blue which contrasts perfectly to the natural light wood of the doors giving a beautiful rustic look. Oli wrote in his email to us: “A great product which allowed us to breathe new life into our doors and complete the look we were wanting for our new dining room as part of our major house renovations.” At Doorstuff we’re so happy to hear back from our happy customers and are so pleased for Oli and Anna!
Sliding doors – The specifics
The Perlan 140 is a high quality, German manufactured, heavy duty timber sliding door gear for doors up to 140kgs each. The system is perfect for use in pocket doors when you’ve already constructed the walls. In cases such as this we recommend attaching the wall mounted sliding tacks and runners to the wall, and then having a single studwork wall build to enclose the track – keeping the wall thickness to a minimum.
The Perlan 140 is also unusual in that the internal profile of the track is symmetrical and therefore can be used upside down as well as the right way up. This means that it is versatile enough for exciting projects such as pool covers, hot tub covers and roof access. As seen in this case study, the door gear can also be used for double doors that open to either side with the option of synchronous opening and closing with a Duosync Kit Upgrade.
Sliding door options
This Perlan sliding door gear comes with end stops which are variable plastic blocks that can be set at any length along the track to control where the travel of the door starts and finishes. In a Perlan 140 set you also get a holdback clip to keep the door in place when open – these act like a latch and require a slight tug to close but would not be a problem for most people, and it is easily removable from the stop if not required.
Soft brakes are unfortunately not available on the Perlan 140 however we have a number of other systems that offer this option. The SAHECO Roller 90, Excellence 60 and Compact X all use a 2 part softbrake system which have incorporate a pneumatic plunger that softens the close and leads the door into the soft stop mechanism which finally pulls the door shut.
Sliding doors – FAQ
One question we get asked often is to do with the function and operation of floor guides in our sliding and pocket door systems. The floor guides which come as standard in the kits are “upside down” T-shaped metal devices about 4cm long that are screwed down into the floor near the side of the door opening (usually just in front of the skirting board). A groove needs to be morticed or cut along the bottom edge of the door. This groove remains in contact with the floor guide and prevents the door from deviating from its straight course. We offer an optional plastic guide protector, which is a black channel that can be fixed into the groove in the bottom of the door, but this is usually not required if the groove has been cleanly cut.
Sliding doors – Automation
The Perlan 140 system is also available as an automatic powered sliding door gear. In these cases the system contains all the components of the standard Perlan 140, but also contains a door drive and a control unit with an integrated power supply. The system works by responding to a gentle push of the door leaf which then activates the ‘Push and Go’ function to open the door automatically. These are perfect for use in homes or buildings that house people with reduced mobility.
Photographs reproduced with the kind permission of Oli and Anna Greene.
If you have any pictures of completed projects using our products we would love to hear from you (you may even get a reward in return) and you can email these to info@doorstuff.co.uk